Sunday 8 January 2012

How to fix TeamViewer (Commercial Use) Tweaks

Here are the quick steps to get rid out of Commercial Use Suspected. Warning & continue to use Team Viewer as a free Version.the tutorial intend here, are intended for educational purposes only.

Never Use Team Viewer for Commercial purposes without proper license.


TeamViewer Commercial use suspected warning message :


step 1. Close team viewer if it's running with your PC.

step 2. Click windows start > Run and type %appdata% now find teamviwer folder and DELETE it.


see image below.


step 3. Beware , this step is very important & you have to follow instruction with caution...
click Windows Start > Run and enter REGEDIT and click ok.
find the registry entry located at HKEY_LOCAL_MACHINE>SOFTWARE> teamviewer and remove the TEAM VIEWER folder.


follow image below..


Now your done! Restart your computer, Run your Team Viewer and connect with anyone else remotely.
there's no more pop-up's Commercial use suspected and it;s gone now!!!

courstesy of. mobilerdx


Friday 6 January 2012

Quad-Core A6 Processor Reference For Next iPhone And iPad Found In iOS 5.1 Beta

Evolution will always bring about change. On some occasions, the change isn’t always considered a move for the better, as some people actually get used to a product the way it is and prefer it to remain. But when talking about consumer technology, and in particular cell phones and tablets, change is inevitable, it is purely a matter of when, not if. If the interpretations of recent findings are to be believed, then Apple’s ‘when’ moment seems like it could be coming soon.


The mobile cell phone industry is extremely competitive, especially when it comes to the latest must have smartphone and tablet devices. It is fast becoming an extreme cut throat industry, with devices not up to the grade being cast aside and quickly forgotten about as they slither away into smartphone obscurity. I like to think of smartphones in the same context as super cars, in that they need to have a certain set of defining characteristics to be able to be classified as such. To me for example, a super car is something that pushes the boundaries of technology at the time, something a little bit out of the ordinary that is capable of doing what others in its industry can’t – whether that be achieving crazy speeds, or having pin point precision handling. I think of a smartphone the same way, as for me it needs to meet a basic feature set before it can be one.
One such requirement for me, is power. Unadulterated processing power. I use my iPhone and iPad for pretty much everything on a day to day basis. Word processing, calculations, telephone calls, instant messaging, gaming, watching high definition movies, and so much more. For any new generation of a particular device; users tend to expect a speed increase, chip technology is moving so fast these days that it would seem ludicrous to not improve performance each year.
The good news is that located in the deepest depths of iOS 5.1 beta, tinkerers have found software relating to processing-core management which offers obvious support for the dual-core A5 chip which currently sits inside the iPad 2 and iPhone 4S, but also supports quad-core processing. The references to this are quite well hidden away, but after some digging reveals text which points to the cores which are supported by iOS hardware. The aforementioned core management software includes an option of "/cores/core.3" which could be confused as indicating a triple core processor, but actually points to a fourth core.
Sources with inner knowledge of the internal workings of iOS have explained that the core count begins at ’0′, effectively meaning that the A4 chip in the iPhone 4 which was single core chipset would be displayed as"/cores/core.0" whereas the current A5 chip would have the option of "/cores/core.1" because 
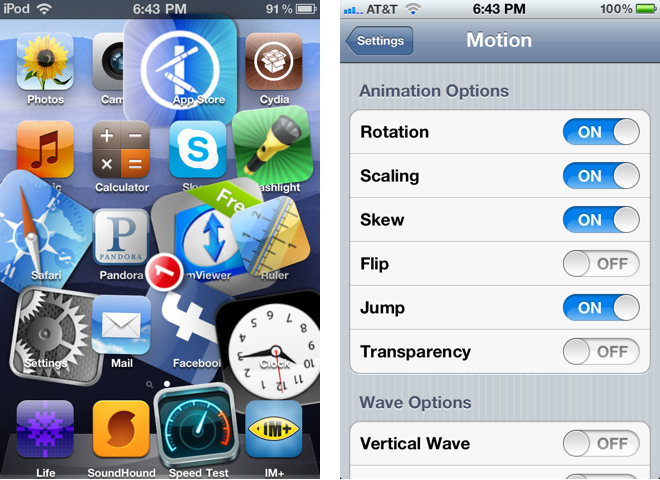
of its dual-core capability. The images below show a comparison between the pre iOS 5.1 beta core management software we mentioned, and the

current iOS 5.1 beta version.


Obviously this is something that can be added to the ‘possible’ list of hardware improvements in any new iOS device. The inclusion of such references could point to a number of things and in no way guarantees we are about to see a quad-core iPad and iPhone about to drop. Although the fact that Asus have just released a quad-core Android tablet could add some fuel to the fire as it is unlikely Apple would allow a competitor to have that advantage for nearly a while twelve months.
via 9to5mac

MuscleNerd, Planetbeing, and P0sixninja Help Pod2g With A5 Untethered Jailbreak [iPhone 4S, iPad 2]

Yesterday Pod2g posted that why the A5 jailbreak had not been released yet, and we posted that Pod2g told us that the untethered jailbreak for iPhone 4S / iPad 2 running iOS 5.0.1 will be released in a week and we are waiting, and two hour age we have more details from Pod2g are coming about untethered jailbreak iPhone 4S and iPad 2.


One hour ago Pod2g post in his blog that he has announced that Planetbeing, MuscleNerd, and P0sixninja have joined his effort to release an untethered jailbreak of the iPad 2 and iPhone4S.
@planetbeing, the legendary hacker behind iPhone Linux and lot of jailbreaks (see http://theiphonewiki.com/wiki/index.php?title=User:Planetbeing) has joined the A5 research!


The famous @MuscleNerd (http://theiphonewiki.com/wiki/index.php?title=User:MuscleNerd), the leader of the iPhone Dev Team, who did a lot of tests for Corona and whom integrated it and made it simple in redsn0w is willing to help also.
And last, but not least @p0sixninja (http://theiphonewiki.com/wiki/index.php?title=User:Posixninja), the leader of the Chronic Dev Team, and my partner for years on iPhone security research has started to code and fuzz the Apple sandbox.
We now have a dream team to find a path for a public release of the A5 jailbreak. Cross your fingers.


via wikijailbreak

Thursday 5 January 2012

Motion Cydia Tweak Brings Your Application Icons On iPhone To Life – Download Now

If you ever take the time to sit and browse through Cydia you will find that the range of tweaks and modifications available for Jailbroken iOS devices is quite simple staggering. Cydia is a thriving platform that contains literally thousands of tweaks, modifications, themes and other utilities that can alter, enhance and generally improve your iOS experience.


One of my all time favorite tweaks available through Cydia is a fun tool called Graviboard, developed by Conrad Kramer. The honest truth is that the tweak doesn’t offer any real functionality, but instead exists purely as a technical show case as what can be achieved by digging into the iOS classes and methods and applying your own code. For those that don’t know, Graviboard makes the devices application icons become susceptible to ‘gravity’ through the use of an Activator based gesture. When applied the application icons fall from the top of the screen to the bottom and can be manipulated either by touch or through the use of the accelerometer.
A recent tweak release by developers J. Corbett and J. Einbinder, known as ‘Motion’ follows down a similar path of manipulating application icons but with an entirely different implementation. Motion is a tweak available for iOS 4 and above which allows a range of effects to be applied to the icons on an iOS device. The tweak is purely aesthetic, and although it doesn’t offer any real functionality boost it does look pretty awesome and is a very elegant implementation of a good idea.


After downloading, Motion is activated by default and can be configured through a preferences entry in the native settings application. At the time of writing the following settings options are available:
    • Rotation: On/Off
    • Scaling: On/Off
    • Skew: On/Off
    • Flip: On/Off
    • Jump: On/Off
    • Transparency: On/Off
    • Vertical Wave: On/Off
    • Horizontal Wave: On/Off
    • Simultaneous: On/Off
The potential is obviously there for the developers to add more effects in the future should they see fit. Motion is a chargeable tweak, and I would imagine that if it is successful then additional options may be added. After using Motion on iOS 5.0.1 on an iPhone 4 for a few hours I experienced no problems whatsoever, with no boot loops or resprings resulting in safe mode. One of the great things about the tweak as well is that it randomly applies the effects to individual icons intermittently which makes for a pretty funky looking Springboard.
Motion is available on Cydia, via the Big Boss repository now at a cost of $1.00.
You will obviously need to have jailbroken device to run it. For jailbreaking iOS 5 untethered, follow our complete step by step instructions posted here to jailbreak iPhone, iPad, iPod touch on iOS 5.0.1 using Redsn0w.
You may also like to check out:
Be sure to check out our iPhone Apps Gallery and iPad Apps Gallery to explore more apps for your iPhone, iPad and iPod touch.


via redmondpie

Wednesday 4 January 2012

iPhone 4S And iPad 2 Untethered Jailbreak Coming Next Week, Confirms Pod2g

Yes, you read it right! Pod2g has just confirmed the release date of iPhone 4S and iPad 2 untethered jailbreak. According to a very recent tweet from pod2g, an untethered jailbreak for A5 devices could be expected next week.


In case you’re not aware, pod2g few days ago released his untethered jailbreak for all A4 devices. The iPhone hacker had some problems with iPhone 4S but it looks like that problems are now being solved.
A5 devices, meaning iPhone 4S and iPad 2, haven’t got a bootrom jailbreak exploit yet like limera1n for A4 devices which allowed permanent jailbreak for these devices.
We’ll keep you informed whenever the tool is released. Make sure to subscribe to our newsletter here.


via  cydiahelp

Tuesday 3 January 2012

How to Install .deb File [iPhone/iPod/iPad Cydia Tutorial]

3 Methods to install a .deb file  into your iDevice  [ (3G/3Gs/4), touch (3G/4G), and 2]. Choose the easier  for you :

1st Method: AutoInstallation [Recommended]

  1. Download iFunbox >> (www.i-funbox.com) Windows , or Cyberduck for MacOS
  2. Run iFunbox and connect your iDevice (iPhone, iPod, iPad or iPad 2)
  3. iFunBox will show your device contents, Now navigate to var/root/Media/
  4. Create the folder Cydia/AutoInstall (if not already created)
  5. Move .deb file from your desktop to var/root/Media/Cydia/AutoInstall
  6. Reboot your iDevice
  7. YOU ARE DONE
TIP : I can not SSH into my iPhone/iPod/iPad!
  • I can not find var/root?
  • I can not SSH into my iPhone/iPad?
  • I have jailbroken device, my SSH client is discovering my iPhone/iPad as (JAILED)?
Install OpenSSH, reboot, then try again. If you still have the problem>> Install afc2add from Cydia then reboot.


2nd Method: Install with  [Recommended]

Requirements:
iOS 4:   and required
iOS 5:   only required
  1. Run Safari and type the address which contains the .deb file
  2. Click on the link of the .deb file >> Download
  3. After finishing download, click on the file in the dowloaded files list >> Open with iFile >> Installer
  4. YOU ARE DONE


3rd Method: Install with Mobile Terminal

Requirements: Mobile Terminal and OpenSSH
“Steps 2 and 3 are only if you never installed a .deb file with this method”
  1. Download the .deb file you want (example : LockInfo)
  2. Start Cydia, go to “Search”, type “Mobile Terminal” and install it
  3. Repeat step 2 for “OpenSSH”
  4. Start “MobileTerminal”
  5. Type the following commands , then reboot:
su  (press return)
alpine  (press return)  /!\ You won’t see the typed password then don’t worry /!\
dpkg -i nameofpackage.deb  (press return, replace nameofpackage with LockInfo for the example)
Note that you can rename the .deb file like 1.deb (it’s easier to type)


courtesy of iPadOS

Monday 2 January 2012

How to Set Up Spire [Video Tutorial]


A few days ago chpwn released Spire — a legal Siri port for the iPhone 4 and other devices.
The release was met with much excitement, and likely just as much confusion. How does it work? Can it work with an existing Siri Proxy?
Getting Spire working on your non-iPhone 4S device may seem daunting, but it’s actually fairly straight forward, especially if you’ve successfully followed our Siri Proxy tutorial in the past.
The Spire setup pretty much involves the same steps needed to get Siri Proxy working, with a few notable differences thrown in.
Check inside as I show you how to get Siri running on your iPhone 4 using Spire. This should also work for other devices like the iPod touch G4…
Before you start read this entire tutorial and view the videos. That way you have a good knowledge of how this works as a whole. It is really important to digest the entire tutorial before proceeding step-by-step. I really can’t recommend this enough.
Please understand that you must have access to an iPhone 4S in order to follow this tutorial. This is also a local only installation. If you want to use Siri over 3G or on foreign Wi-Fi on your non-4S device, you can setup a dynamic DNS on your virtual machine installation so that you can access Siri Proxy from anywhere. That is beyond the scope of this particular tutorial. Now that you are aware of the limitations involved with this tutorial, please proceed.

Setting Up Siri Proxy

Step 1: The first step is to follow our in-depth Siri Proxy setup tutorial. That tutorial showcases the basics in getting Spire working on your iPhone 4 or other devices.


Step 2: There is one small change in the Siri Proxy Tutorial that is required for using Spire. At Command 09, change the following command: git clone git://github.com/plamoni/SiriProxy.git -to- git clone git://github.com/westbaer/SiriProxy.git This is incredibly important. If you don’t alter Command 09 of the Siri Proxy Tutorial, then Spire will not function correctly. If you’ve already previously setup Siri Proxy, you can literally stop the server, and start at Command 09 to get it working. I’ve confirmed that this method works. If you’ve never setup Siri Proxy, simply follow the Siri Proxy Tutorial and replace Command 09 with the new command above. Once Siri Proxy is up and running you may proceed with the Spire setup tutorial below: Setting up Spire Once you’ve confirmed that Siri Proxy works on your iPhone 4S using the Siri Proxy Tutorial, you may proceed with the Spire setup. Remember, you must have Siri Proxy running on your iPhone 4S before proceeding. Confirm that it works by invoking Siri and saying “Test Siri Proxy.” Siri should respond with “Siri Proxy is Up and Running!” Only then should you proceed with the Spire setup. The following video shows the start-to-finish Spire setup. If you already have Siri Proxy installed using the steps above, the you may want to skip to 4:30 on the video for the Spire installation.


Step 1: If you have not done so already, jailbreak your iPhone 4. To learn how to jailbreak, check out our dedicated jailbreak page. Step 2: Install Spire from Cydia. This will take a while, so be patient. It is a large download. You must reboot your device after installation. Step 3: Install iFile from Cydia. There are alternatives to this step, but this is the easiest and most straight forward method. iFile has a free trial period if you don’t want to pay for it. I highly recommend you use iFile. Step 4: Install the same certificate on your device that you installed on your iPhone 4S in the Siri Proxy Tutorial. It must be the same certificate. Like in the previous tutorial, I recommend using DropBox to transfer the certificate to your iPhone 4, but you can use email or other means as well. Again, as stated in the Siri Proxy Tutorial, the certificate can be found at ~/.siriproxy/ca.pem, and it is a hidden folder, so you will have to show hidden folders. Step 5: Go to Settings > General > Siri and enable Siri. Step 6: Go to Settings and configure Spire settings with the following Proxy Host: https://guzzoni.apple.com Step 7: Open iFile, and navigate to /etc/ and open the “hosts” file using iFile’s Text Viewer. Tap on Edit in the upper left-hand corner, and create a new line that includes the following: (the ip address of your Ubuntu virtual machine) followed by guzzoni.apple.com So for example, my new line looks like so: 10.0.1.12 guzzoni.apple.com Tap Done. Step 8: Go back to your Home screen, and test out Siri by holding the Home button. You should see data hit your server, but it will say something like this: [Info - Guzzoni] Received Object: CommandFailed [Info - Guzzoni] Received Object: CommandFailed This is good, and shows that you can now communicate to the Siri Proxy Server. Now all we need to do to make Siri work for real is add three more necessary fields to the Siri plist file. Step 9: Again, in iFile navigate to var/mobile/Library/Preferences/ and open com.apple.assistant.plist with the Property List Viewer. Tap on Accounts > Your Hex Key (random alphanumeric value) > and add the following fields using the “+” sign in the bottom right-hand corner: Ace Host Assistant Identifier Speech Identifier Tap Done. Step 10: Invoke Siri by holding the Home button, and say “Test Siri Proxy.” It should respond just like it did on the iPhone 4S: “Siri Proxy is Up and Running!” If successful, congratulations, you just got Siri working legally on your non-iPhone 4S device! Step 11: You can now remove the DNS server from your iPhone 4S, or just append your real DNS server after the Siri Proxy IP address using a comma. This is optional, but allows you to still use Siri Proxy and access the internet and use apps with no problems on your iPhone 4S. Example: 10.0.1.12,10.0.1.1 There are lots of other possibilities and troubleshooting steps for Spire and Siri Proxy in general. This is probably the most basic implementation of Spire usage that you will come across thus far. I can’t take all of the credit though. Special thanks to Methoddk for his excellent tutorial which helped a lot with regard to plist params. Also, an obvious thanks goes to chpwn for making such an awesome (and legal) Siri port, and Plamoni and Westbaer for their Siri Proxy implementations. I know many of you will continue to have questions and issues. We will try our best to help where time permits, but our best advice is to experiment and follow the tutorial closely. Be sure to read and watch the videos in their entirety before even attempting this. If you have questions about Ubuntu, virtual machines, etc. Our best advice is to see our original Siri Proxy Tutorial. 


via iDB